Deciding where to locate a bat house can be quite the feat, especially for new or prospective bat house owners. Even with the number of available resources detailing the criteria for siting a successful bat house, one size doesn’t always fit all. Like many of these resources, we generally recommend mounting a bat house to a wooden post. We also recognize that this isn’t always ideal.
With BCM headquarters located in Central Pennsylvania, it’s not uncommon for us to encounter an old house. As with many old houses in this part of the country, stonework is abundant, and for many homeowners, this can pose unique challenges when trying to attach something to it—whether it be a clothesline, or in this case, a bat house.
In this article, we’ll take you through a quick and easy guide to mounting a bat house to stonework. Specifically, we’ll be mounting a BCM Four-Chamber Premium bat house, using one of our custom pole mount kits. For more useful information on choosing the ideal location for your bat house, see our other helpful articles, “Choosing a Bat House Location” and “How to Install a Bat House on a Post”.
Let’s begin!

Step 1: Stonework comes in all different shapes and sizes. The key is finding a nice sunny area on the stone that is going to allow your bat house to sit flush so that it won’t have too much of a tilt. (If your bat house is titled or rocks back and forth, it’s generally due to a rock in the stonework that juts out further than the other surrounding stones.) Keep in mind, drilling into stone or concrete is very different than drilling into wood, so you will first need a couple of extra tools to help you along:
- Hammer Drill, or a multi-purpose drill with hammer function.
- Tapcon® Concrete Anchor screws
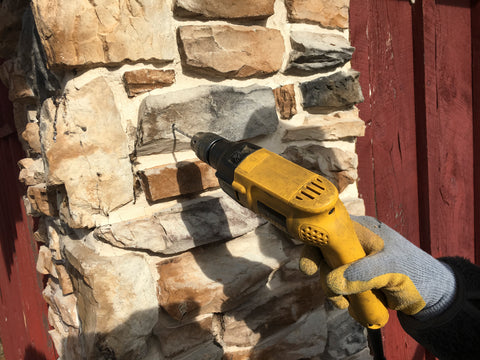
Step 2: If you are using one of BCM’s Pole Mount Kits, we recommend marking out exactly where your pole mount kit is going to attach to the wall. This means making sure that the vertical distance between your two pole mount brackets will accommodate the height of your bat house after the brackets are mounted to the stone. You may need to dry-fit your bat house against the wall a couple of times to get an idea of where the pole mount brackets will go. Measuring twice is the best way to ensure that your bat house ends up in the right place!
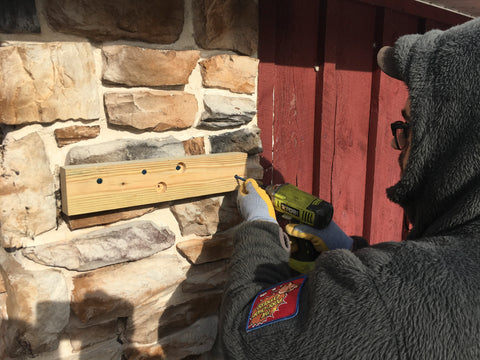
Step 3: Once you have your first pole mount bracket in place, use a masonry bit and Tapcon screws to secure the bracket to the stone. Remember, you will need to pre-drill all holes in the stone before you can use the Tapcon screws. We found that an easy way to do this is by completing a single hole at a time- drilling the hole then immediately driving a screw into it before moving on to drill your next hole. This will get your pole mount bracket secured to the wall by at least one point, which will make it easier to move along and make the other holes without having to hold up the bracket. Remember that hammer drill? Making those holes is the part where you'll want to use the hammer setting on your drill.
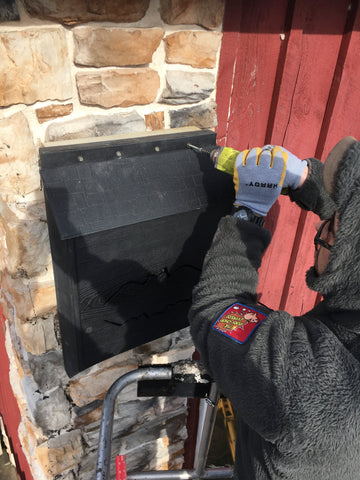
Step 4: In the picture above, we are installing a black Four Chamber Premium bat house from BCM. Locate the top lip of the bat house, just above the slanted roof section.With both pole mount brackets completely fastened and in place, the bat house should be lined up so that the top of the upper pole mount bracket and the top of the bat house are flush.
Step 5: With the bat house in place, take one of the included 2 ½” mounting screws with countersunk steel washer and fasten the top of the bat house to the pole mount bracket, spacing the screws evenly across the top lip of the bat house.
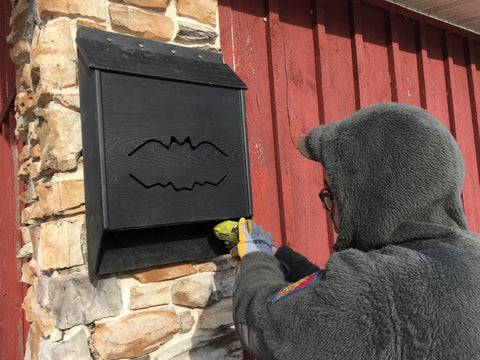
Step 6: With the top of the bat house now secured, it’s time to fasten the bottom of the bat house to the lower pole mount bracket. Take note, if using BCM's Four Chamber Premium Bat House, the bat house will extend approximately 1” past the lower bracket. Using the remaining screws and countersunk washers, fasten the lower portion of the bat house to the bracket as seen above.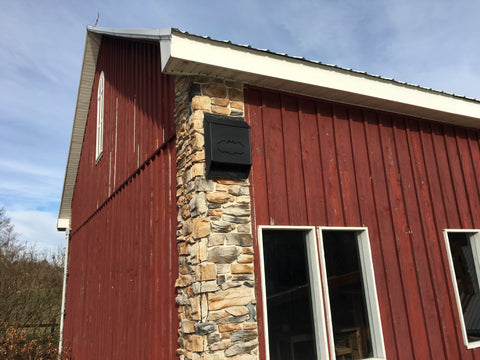
Step 7: Voilà! At this point your bat house should be firmly secured and ready for bat occupancy. Well done! Notice we were careful NOT to tuck the bat house up under the eves, as that would have cast a shadow on the bat house. Instead, it is intentionally placed a few feet down so it bakes in the sun all day.


